Make-Ahead Apple Cobbler: Your Shortcut to Seasonal Sweetness
Few desserts evoke the cozy comfort of autumn quite like a warm, bubbling
apple cobbler recipe. The aroma of cinnamon-spiced apples mingling with a tender, cake-like topping is simply irresistible. But what if you could capture that feeling and serve it up with minimal fuss, even on the busiest of days? Enter the make-ahead apple cobbler – a culinary game-changer that lets you enjoy this seasonal delight effortlessly.
Imagine the joy of fresh apples, hand-picked during a crisp fall outing, transformed into a dessert that's ready to bake or simply reheat when the craving strikes. This article will guide you through creating a sublime apple cobbler from scratch, focusing on the simple, yet crucial, steps of peeling, prepping, and freezing, ensuring you always have a taste of homemade goodness at your fingertips.
The Secret to Stress-Free Dessert: Why Make-Ahead Apple Cobbler?
Life moves fast, and while we cherish the idea of homemade treats, time is often a luxury. This is where the make-ahead approach for an
apple cobbler recipe shines. It transforms a delightful, but sometimes time-consuming, baking project into an act of thoughtful preparation. The benefits are numerous:
*
Seasonal Abundance: Apple picking is a beloved fall tradition, offering a bounty of fresh fruit. A make-ahead cobbler allows you to utilize this harvest efficiently, preventing waste and ensuring those vibrant flavors are preserved.
*
Effortless Entertaining: Hosting a dinner party or a family gathering becomes a breeze when dessert is already prepped. Just pull your frozen cobbler from the freezer, thaw, and bake – allowing you more time to spend with your guests.
*
Spontaneous Sweet Cravings: Had a long day? Unexpected company? With a frozen cobbler waiting, a delicious, warm dessert is just an oven away, perfect for satisfying that sudden sweet tooth.
*
Thoughtful Gifting: There's no present quite like a homemade treat. Doubling your
easy apple cobbler recipe and gifting one to a neighbor or friend is a wonderful gesture that spreads warmth and cheer.
*
Family Involvement: Preparing the cobbler can be a fun family activity. Kids love peeling apples (with supervision!) and mixing ingredients, fostering a sense of accomplishment when they see their creation enjoyed later.
Opting for a make-ahead strategy doesn't compromise on quality; in fact, it often enhances it, allowing the flavors to meld beautifully. For more traditional baking, discover the
Easy Apple Cobbler: Homemade Perfection with a Cakey Top that inspired some of these techniques.
Crafting the Perfect Apple Cobbler: Ingredients and Method
At the heart of any great cobbler is a balance of sweet and tart apples, a comforting spice blend, and a truly delectable topping. Our preferred
apple cobbler recipe delivers a unique cake-like topping that offers a delightful contrast – crisp on the outside, wonderfully soft and absorbent in the center, soaking up the luscious apple sauce beneath.
Choosing Your Apples Wisely
While any apple variety can technically be used, some stand out for their texture and flavor when baked. Varieties like
Honeycrisp,
Gala, and
Fuji are excellent choices, offering a good balance of sweetness and firmness that holds up well during baking. If you prefer a tarter profile, a Granny Smith blended with a sweeter apple can create a more complex flavor.
A crucial step: peel your apples. Unlike apples in a pie, where the longer baking time might soften skins, cobblers typically bake for a shorter duration. Leaving the skins on can result in an unpleasantly tough and chewy texture in your otherwise tender filling. So, grab your peeler and embrace this essential task for a superior mouthfeel. Once peeled, core and slice your apples into roughly 1/4 to 1/2-inch pieces. You'll need about 6 cups for a standard 9x13 inch pan.
The Cake-Like Topping: A Step Above
Many cobbler recipes feature a biscuit or crumble topping, but our approach provides a delightful cake-like texture that truly elevates the dish. This unique topping becomes crisp around the edges while remaining tender and moist, allowing it to beautifully absorb the warm, spiced apple juices.
Here’s a breakdown of the simple yet effective process for a scrumptious
homemade apple cobbler:
*
The Apple Filling: In a large bowl, combine your peeled, sliced apples with 1/3 cup brown sugar and 1 teaspoon of cinnamon. A pinch of nutmeg can also be added for extra warmth. Toss gently to coat the apples evenly.
*
The Base: Preheat your oven to 325°F (160°C). Melt 1/2 cup of margarine (or butter) directly in a 9x13 inch baking pan. This creates a rich, buttery base that the batter will bake into.
*
The Batter: In a separate large mixing bowl, whisk together 2 cups of all-purpose flour and 1 1/2 cups of granulated sugar. Gradually add 1 1/4 cups of milk and 2 teaspoons of vanilla extract, stirring until smooth. Finally, stir in 3 teaspoons of baking powder until just combined.
*
Assembly (The "Do Not Stir" Secret): Carefully pour the batter over the melted butter in the baking pan.
Do not stir! This is key. Next, spoon the apple mixture evenly over the batter. Again,
do not stir! This method allows the batter to rise through the apples and butter, creating that distinct, self-saucing bottom and cake-like topping.
*
Bake to Perfection: Bake for 40-50 minutes, or until the edges are golden brown and the apple filling is bubbly. Let it cool slightly before serving.
For more fall inspiration and the perfect context for enjoying your cobbler, check out
Your Go-To Fall Apple Cobbler: Perfect for Apple Picking.
Mastering the Art of Freezing: Peel, Prep, and Store for Later
The true magic of a make-ahead
apple cobbler recipe lies in its freezer-friendly nature. You have two excellent options for freezing, depending on your preference: freezing the apple filling or freezing the entire baked cobbler.
Freezing the Apple Filling
This method is ideal if you want to assemble and bake the cobbler fresh at a later date, giving you that ultimate "just baked" experience.
1.
Prepare the Filling: Peel, core, and slice your apples as described above. Toss them with brown sugar and cinnamon.
2.
Package: Transfer the spiced apple filling into a freezer-safe, airtight container or a heavy-duty freezer bag. Squeeze out as much air as possible if using a bag to prevent freezer burn.
3.
Label: Don't forget to label with the date and contents.
4.
Freeze: The apple filling can be kept in the freezer for up to 3 months.
5.
Thaw & Bake: When ready to bake, thaw the filling in the refrigerator overnight. Then proceed with the rest of the cobbler recipe as usual, melting butter, mixing batter, and layering. You might need to add a few extra minutes to the baking time since the filling will be cold.
Freezing a Fully Baked Cobbler
This is the ultimate convenience – a complete dessert ready to be thawed and warmed.
1.
Bake and Cool: Prepare and bake your
easy apple cobbler recipe completely. Let it cool entirely to room temperature. This is crucial to prevent ice crystals from forming, which can affect texture.
2.
Portion (Optional): If you plan on serving individual portions, you can cut the cobbler into squares before freezing. This makes reheating small amounts much easier.
3.
Wrap and Freeze: Cover the entire baking dish tightly with several layers of plastic wrap, then a layer of aluminum foil. Alternatively, transfer cooled individual portions to freezer-safe containers.
4.
Label: Label clearly with the date.
5.
Freeze: A baked apple cobbler can be safely frozen for up to 3 months.
Thawing and Reheating for Perfection
Whether you've frozen the filling or a fully baked cobbler, proper thawing and reheating are key to preserving its deliciousness.
*
Thawing: For a fully baked cobbler, transfer it from the freezer to the refrigerator and allow it to thaw overnight. For the filling, also thaw overnight in the fridge.
*
Reheating a Baked Cobbler: Once thawed, remove the plastic wrap and foil (if applicable). Place the cobbler in a preheated oven at 350°F (175°C) for 20-30 minutes, or until heated through and bubbling around the edges. If the topping starts to brown too much, you can loosely tent it with foil.
*
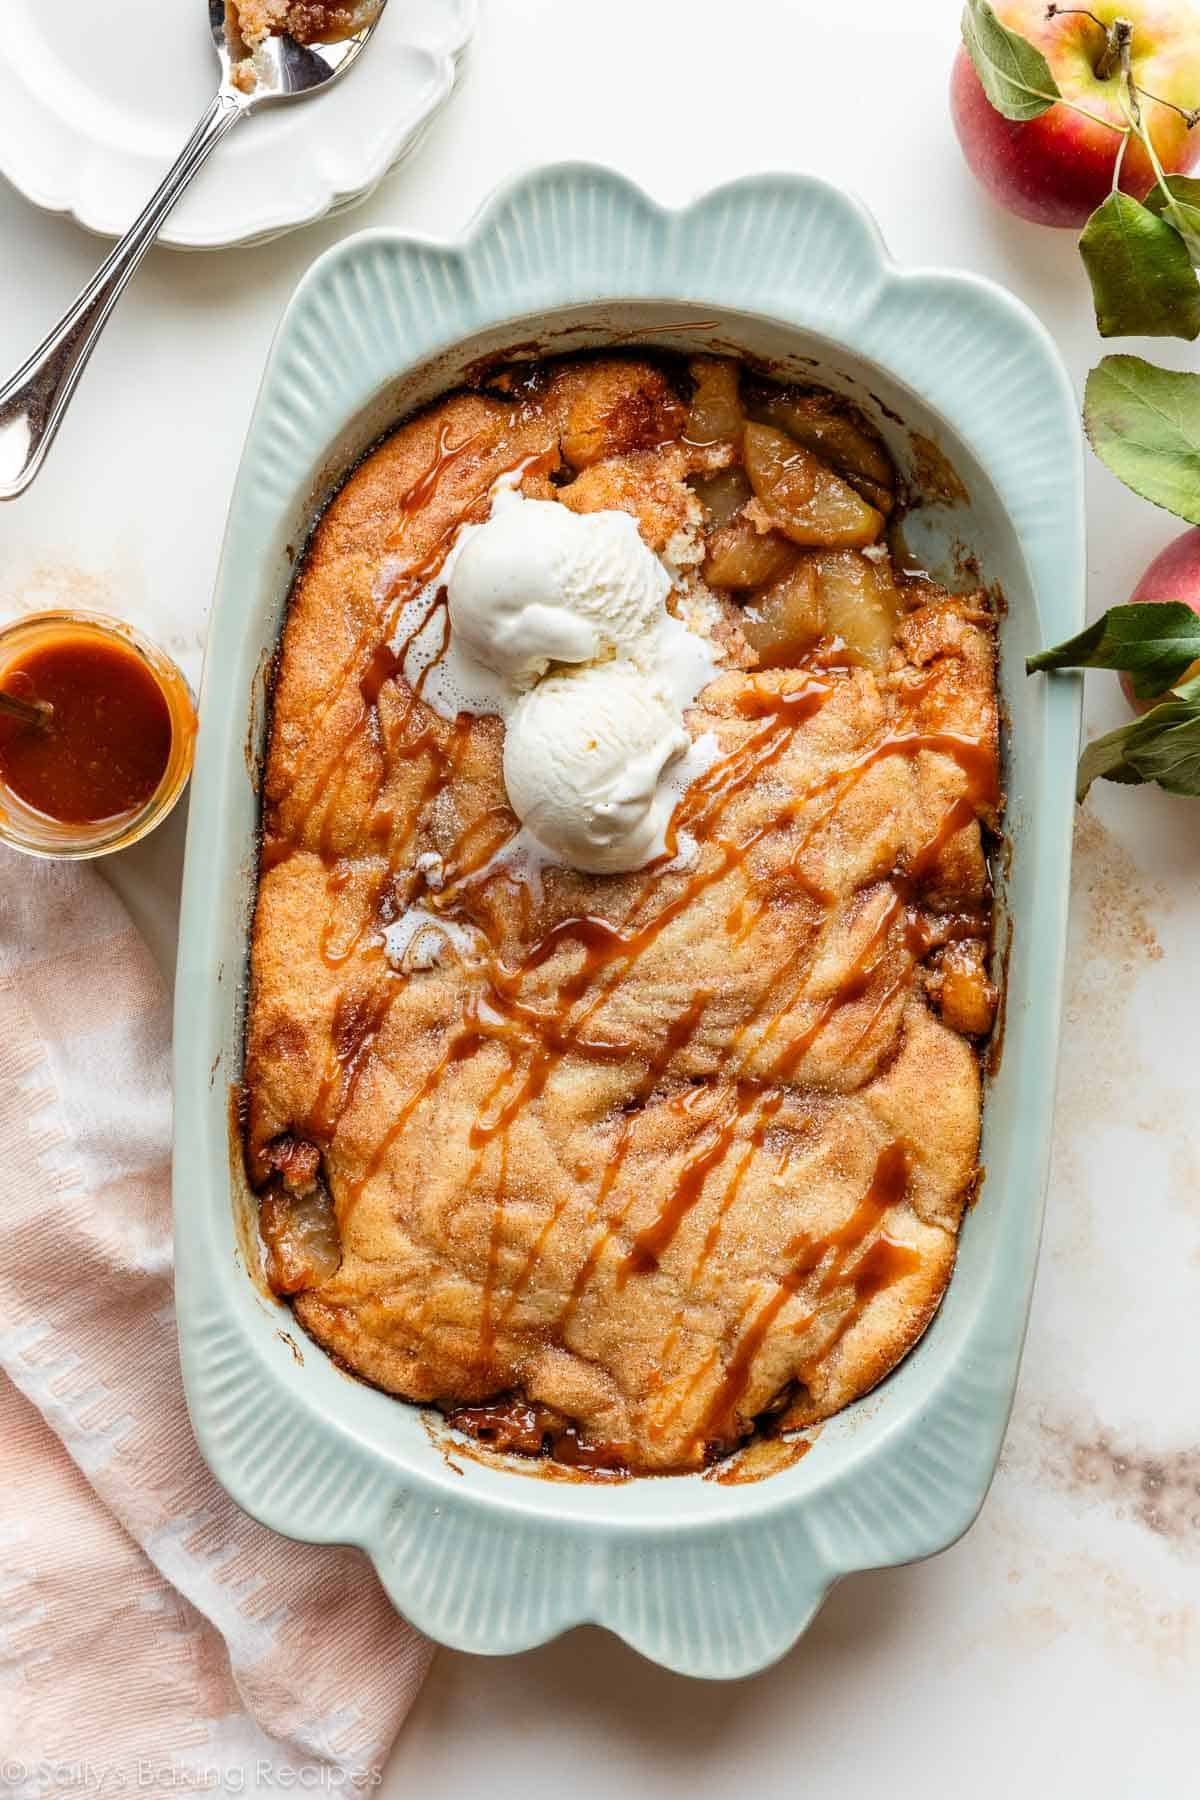
Serving Suggestions: A warm apple cobbler is exquisite on its own, but it truly shines with a scoop of vanilla ice cream, a dollop of fresh whipped cream, or even a drizzle of caramel sauce. The contrast of warm fruit and cold, creamy topping is simply heavenly.
Conclusion
Embracing the make-ahead philosophy for your favorite
apple cobbler recipe transforms a delightful dessert into a convenient staple. From the joyful chaos of apple picking to the simple act of peeling and freezing, every step is an investment in future moments of warmth and sweetness. Whether you're planning for holiday entertaining, a quick family treat, or a thoughtful gift, knowing you have a homemade apple cobbler ready and waiting brings an unparalleled sense of culinary satisfaction. So go ahead, peel those apples, prep your filling, and savor the anticipation of easy, delicious moments ahead.